Using Elementor to Add Content and Style a Web Page
Elementor is a popular page-builder plugin for WordPress. It uses drag-and-drop capabilities to add and edit content. As a result, page designers see the result of their additions and edits as it occurs. In addition, Elementor creates code to accomplish this in the background so the user needs no knowledge of coding.
Using Sections and Elements
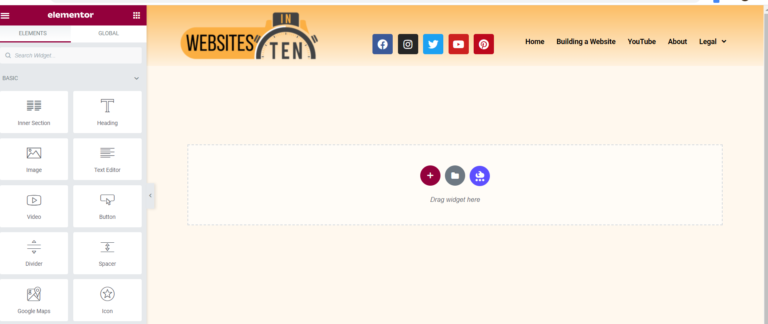
Fig. 1 below shows a new Elementor page. First, notice that the header for the site already appears at the top. Secondly, the icons on the left represent the “elements” that the user drags into a section. Finally, below the header, there are three buttons. The red plus sign adds a new section to the page.
Fig. 1 New Elementor screen ready for sections to be added
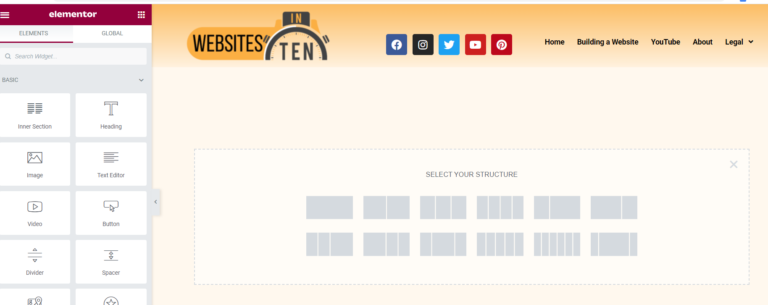
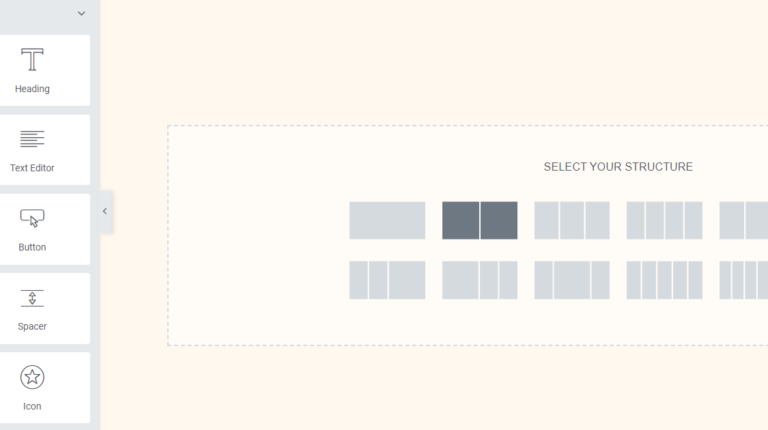
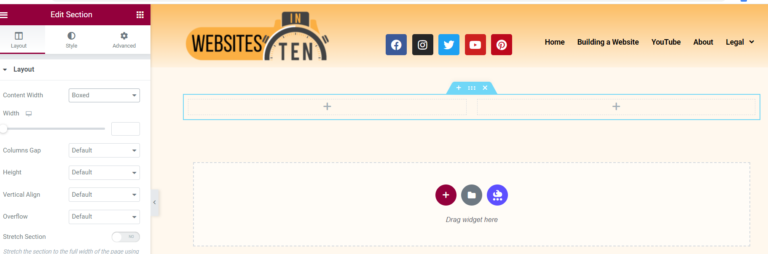
Clicking the red plus sign (+) opens a window that allows the user to select a section template. Subsequently, this template controls the initial number and placement of columns in the section. Fig. 2 shows this window. However, choosing one of these templates is only a starting point. First, once chosen, the designer can add or remove columns. In addition, dragging a column divider left or right controls the width of a column. Fig. 3 is an example of selecting a 2-column layout with each column of equal width. Finally, Fig. 4 shows the new empty section added beneath the header.
Fig. 2 Choosing the new section layout
Fig. 3 Example of selecting a 2-column template of equal widths
Fig. 4 Screen shot after a new 2-column section has been added
Adding Elements to a Section
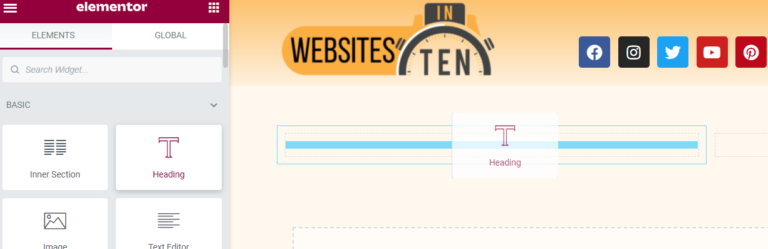
The plus signs in the two columns of the new section indicate that the section is ready for content. As a result, adding content is as simple as dragging the element to a column on the right. First, Fig. 5 shows a heading dragged over the left column. Consequently, dropping the element results in the heading being placed in the left column as shown in Fig. 6.
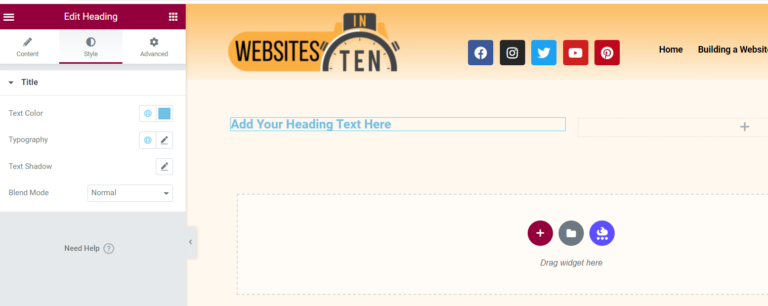
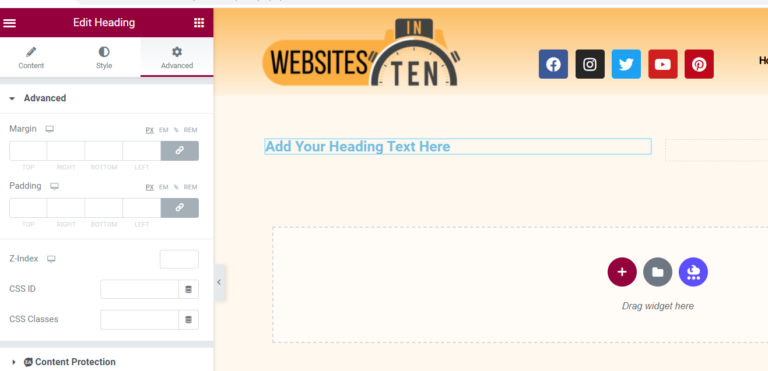
Secondly, note that the left side of the page changed from the elements icons to the Edit Heading menu. Notably, this menu is divided into three parts at the top. First, the Content menu allows the user to type the title, make it a link if desired, and set the horizontal placement. Secondly, the Style menu controls the look of the title. It is shown to the left in Fig. 7. It controls the font, color, style, and size of the the text. Finally, the Advanced menu controls things like the margins and padding, background, borders, and effects. It is shown in Fig. 8.
Fig. 5 Adding elements to an Elementor section
Fig. 6 Adding a header and the Edit Header menu
Fig. 7 Edit Header Style menu
Fig. 8 The Edit Header Advanced menu
Adding Content to the Right Column
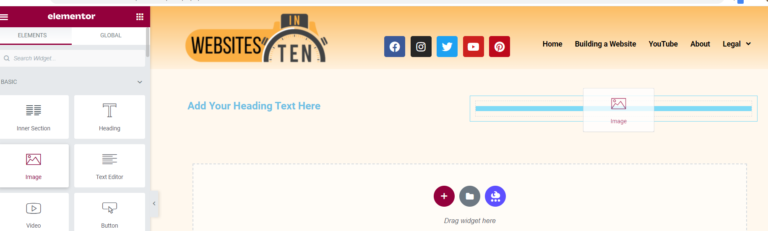
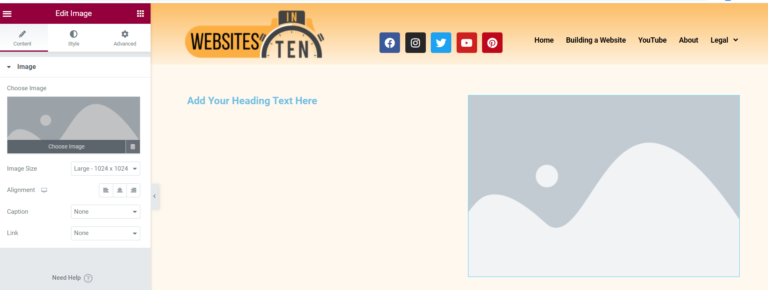
In the same way, we add a content element to the right column. In this example, we are adding an image. First, drag and drop the image element icon in the second column. Then, use the Edit Image menus on the left to choose, style, and position the image (see Fig. 9 & 10). Additionally, notice the familiar content, style, and advanced menus are available to edit the image.
Fig. 9 Inserting an image in column 2
Fig. 10 Image inserted into the second column
Continue the Process by Adding Sections and Elements as Needed
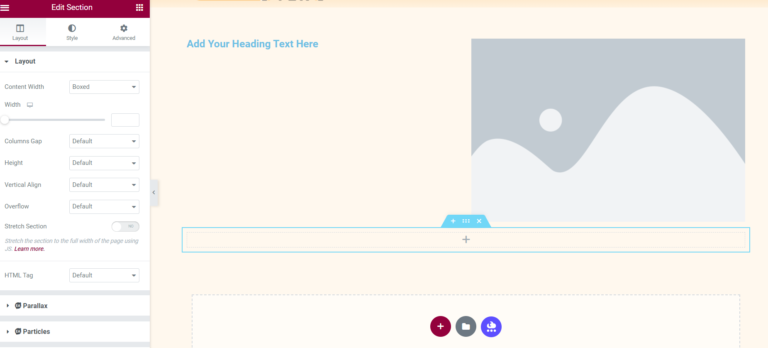
A User can add other elements to the columns in the current section or additional sections below the first. In addition, an inner section can be added to a column using the Inner Section Element. Therefore, Fig. 11 shows a new one-column section inserted below the original section. As before, this was done by selecting the red plus sign and clicking the one-column template. Finally, content is added to this section by dragging and dropping elements from the left.
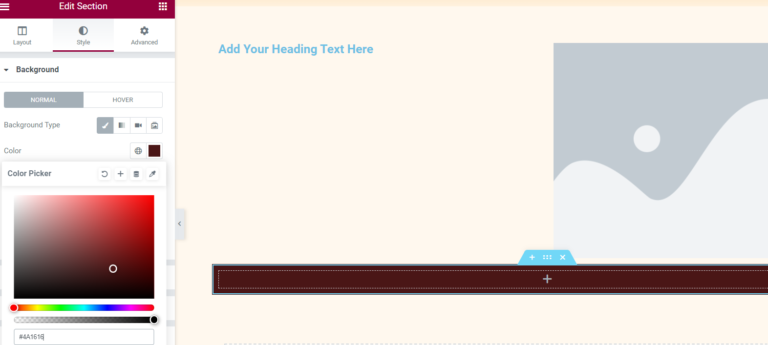
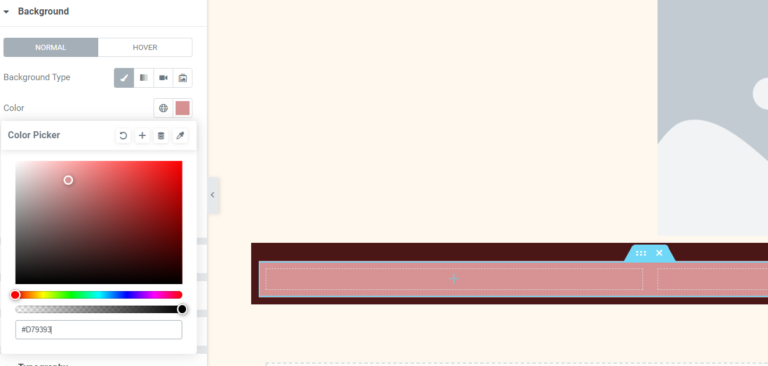
Just like elements, the section itself can be styled and positioned. Therefore, to style the section, click the six dots in the middle of the tab above the section. As a result, Fig. 12 shows the new section after changing the background color. Next, content is added to the new section. Subsequently, in Fig. 13, a 2-column inner section is added and its background color changed.
Fig. 11 Adding a new section below the original
Fig. 12 Changing the background color of an entire section
Fig. 13 Adding an inner section and changing its background color
Adding Written Content Using the Text Editor Element
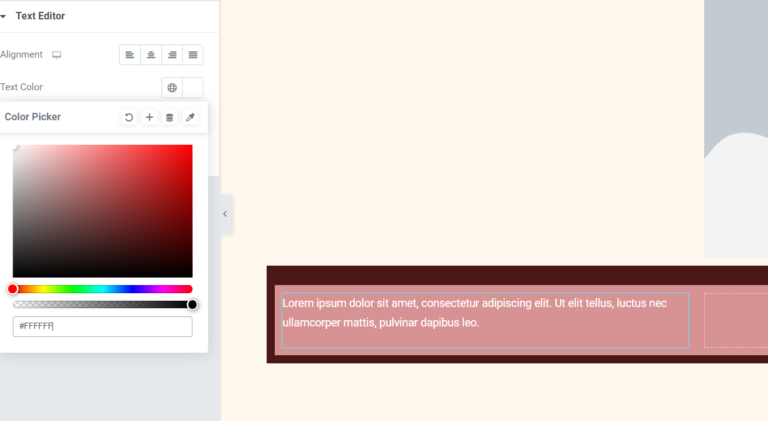
The Text Editor element allows a user to add written content. In the same way as other elements, it has content, style, and advanced menus. As a result, this allows the user to type content, choose fonts and styles, and position the text. Fig. 14 shows text positioned in the left column of the inner section. In addition, the text color was changed to better fit the background.
Fig. 14 Adding text to a section
Publishing a Page
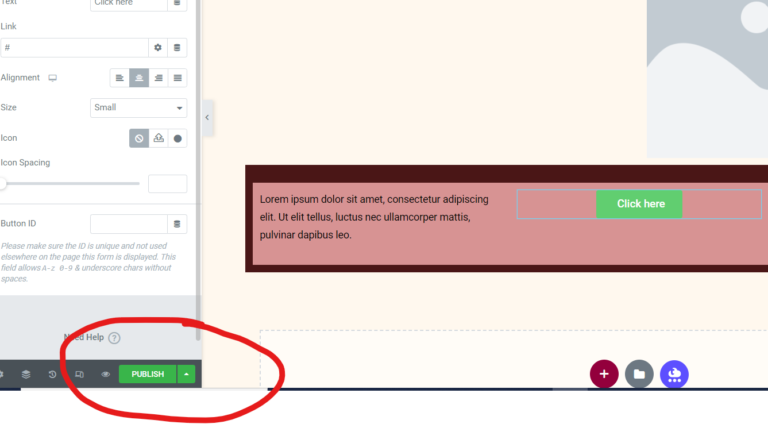
Fig. 15 shows the Publish button in Elementor. After the page is complete, clicking publish will make it available on the Internet.
Fig. 15 Publishing an Elementor Page
Start a WordPress Website. It's Easy and Straightforward.
In order to use Elementor, its plugin must be installed on a WordPress site. WordPress combined with Elementor makes pages easy to create. However, to install and use Elementor to control of the look of your website, you need a self-hosted WordPress website. As a result, you can use all the features of WordPress along with its themes and plugins. In addition, this process is easy, even if you have no experience creating a website.
First, get a domain name that represents your website. Registrars sell domain names to end users like you and me. In addition, many of these registrars provide web hosting as a kind of one-stop shopping for setting up a website and you will need a host. Secondly, get a host who provides space for storing the website content. Additional they provide the connection to the Internet. Finally, get a host that has WordPress installed and ready for installation on your website.
One company, Bluehost, pays me a commission (at no cost to you) if you click a link on this page and sign up for a domain and hosting by Bluehost. Bluehost hosts this website. Further, it also acts as the domain registrar for websitesinten.com and other domain names that I own. In addition, Bluehost provides a free domain name for one year. Finally, this is the one I use, but there are hundreds of these registrar/hosts available on the Internet that provide comparable services.
Regardless of who you use for hosting, much of the process is the same. To see how I originally built this website, check out the videos in the Building a Website Series.
We use cookies on our website to give you the most relevant experience by remembering your preferences and repeat visits. For details on how we use cookies, please see our Privacy Policy. By clicking “Accept”, you consent to the use of ALL the cookies.
This website uses cookies to improve your experience while you navigate through the website. Out of these, the cookies that are categorized as necessary are stored on your browser as they are essential for the working of basic functionalities of the website. We also use third-party cookies that help us analyze and understand how you use this website. These cookies will be stored in your browser only with your consent. You also have the option to opt-out of these cookies. But opting out of some of these cookies may affect your browsing experience.
Necessary cookies are absolutely essential for the website to function properly. These cookies ensure basic functionalities and security features of the website, anonymously.
Cookie
Duration
Description
cookielawinfo-checbox-analytics
11 months
This cookie is set by GDPR Cookie Consent plugin. The cookie is used to store the user consent for the cookies in the category "Analytics".
cookielawinfo-checbox-functional
11 months
The cookie is set by GDPR cookie consent to record the user consent for the cookies in the category "Functional".
cookielawinfo-checbox-others
11 months
This cookie is set by GDPR Cookie Consent plugin. The cookie is used to store the user consent for the cookies in the category "Other.
cookielawinfo-checkbox-necessary
11 months
This cookie is set by GDPR Cookie Consent plugin. The cookies is used to store the user consent for the cookies in the category "Necessary".
cookielawinfo-checkbox-performance
11 months
This cookie is set by GDPR Cookie Consent plugin. The cookie is used to store the user consent for the cookies in the category "Performance".
viewed_cookie_policy
11 months
The cookie is set by the GDPR Cookie Consent plugin and is used to store whether or not user has consented to the use of cookies. It does not store any personal data.
Functional cookies help to perform certain functionalities like sharing the content of the website on social media platforms, collect feedbacks, and other third-party features.
Performance cookies are used to understand and analyze the key performance indexes of the website which helps in delivering a better user experience for the visitors.
Analytical cookies are used to understand how visitors interact with the website. These cookies help provide information on metrics the number of visitors, bounce rate, traffic source, etc.
Advertisement cookies are used to provide visitors with relevant ads and marketing campaigns. These cookies track visitors across websites and collect information to provide customized ads.